Overview
This article details the various tabs found under the MailEssentials Dashboard node. You will learn how to launch the web console post-installation and how to log in before you can view the application Dashboard.
Introduction
This article will assist MailEssentials Administrators to become familiar with the MailEssentials user interface by providing an overview of the various Dashboard screens available in MailEssentials.
You will learn to navigate to the MailEssentials Dashboard and the functionality available in the various tabs under the Dashboard node.
Description
Navigate to the MailEssentials Dashboard by following the below steps:
Open the MailEssentials Configuration Console by navigating to Start > GFI MailEssentials > MailEssentials Configuration

This will open the MailEssentials Configuration Console in a new browser tab on your default web browser.
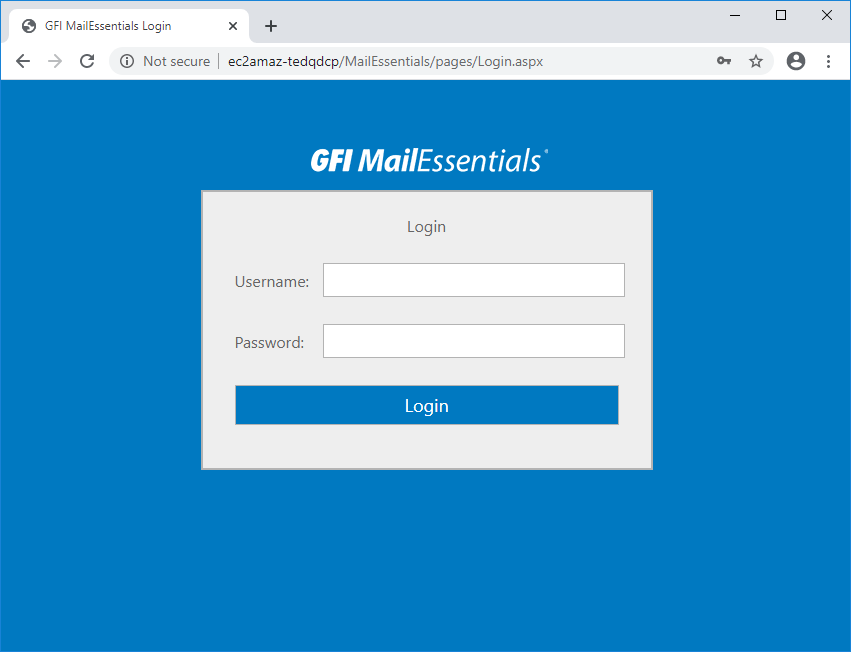
The default URL for the Login page is:
- http://[hostname or IP address]/MailEssentials/pages/Login.aspx
This URL can also be copied and reopened in any of the supported browsers. Refer to this linked article for the latest list of supported internet browsers. If accessing MailEssentials over the internet, the hostname section of the URL should be substituted with the Fully Qualified Domain Name (FQDN) or Public IP address of the MailEssentials server.
You will be presented with the below login screen where you need to provide valid credentials before you can proceed:
Successful authentication will allow the Administrator access to the MailEssentials Configuration console. Straightaway, we can see from the left-hand pane, some of the great features available in MailEssentials.
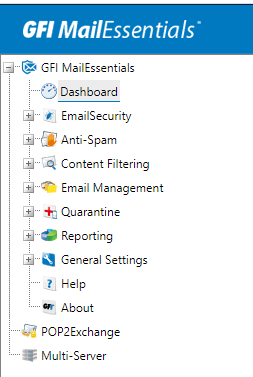
Dashboard
To access the Dashboard, go to GFI MailEssentials > Dashboard. You will be presented with the Dashboard screen which has 5 tabs namely:
Dashboard
The Dashboard tab/screen provides a quick overview of all the enabled or disabled services, how many emails have been quarantined, how many emails were detected with malware or spam, and more.
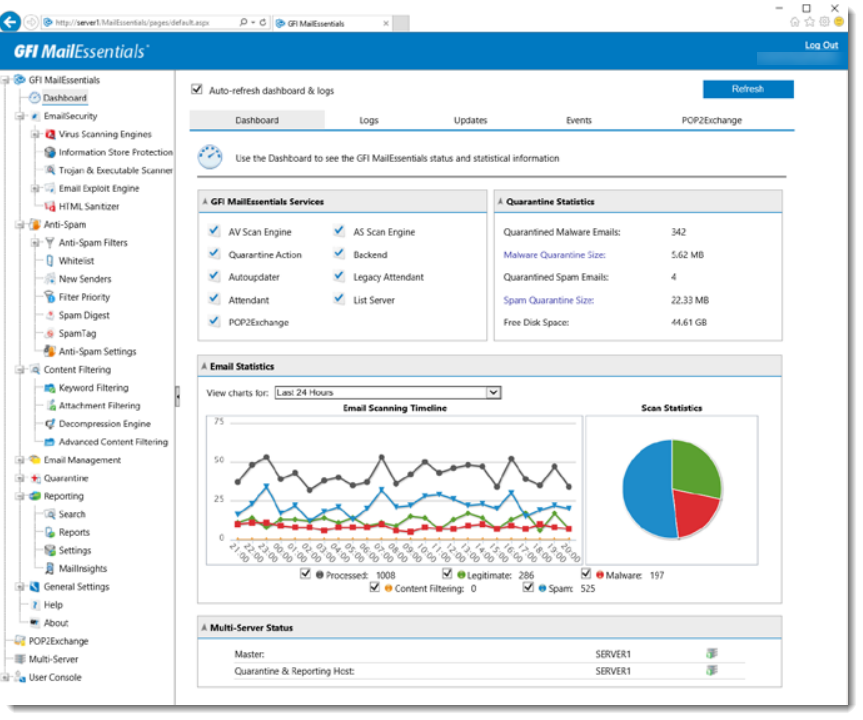
The GFI MailEssentials Dashboard provides real-time information that enables you to monitor the product. This includes:
- Important statistical information about blocked emails.
- Status of GFI MailEssentials services.
- Graphical presentation of email activity.
Logs
The Logs tab shows the list of all the processed emails. Here you can easily perform a search for any email received using various search options, as seen in the screenshot below.
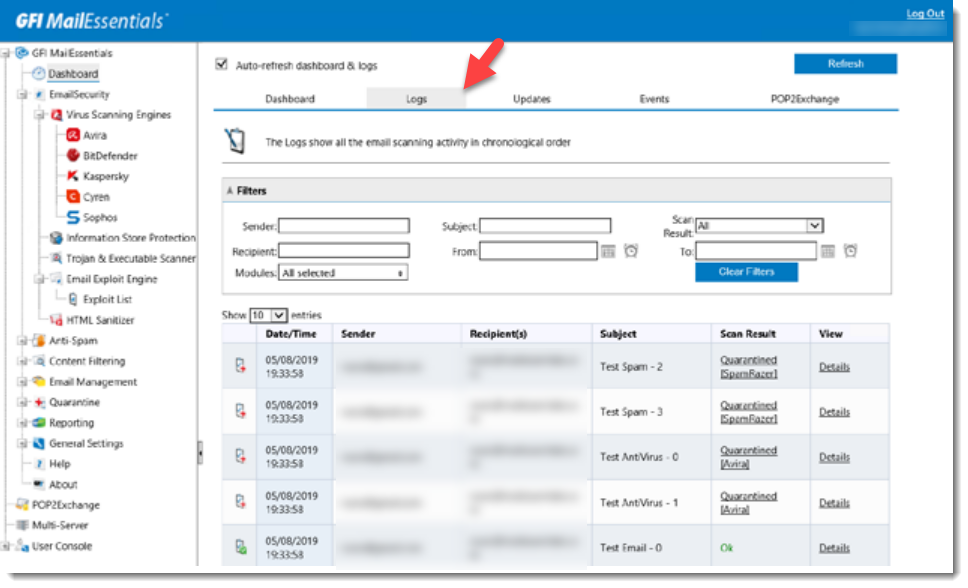
This screen makes it possible to monitor all processed emails in real-time. Likewise, you can add recipients and senders to the whitelist or blocklist as described in Working with the email processing logs.
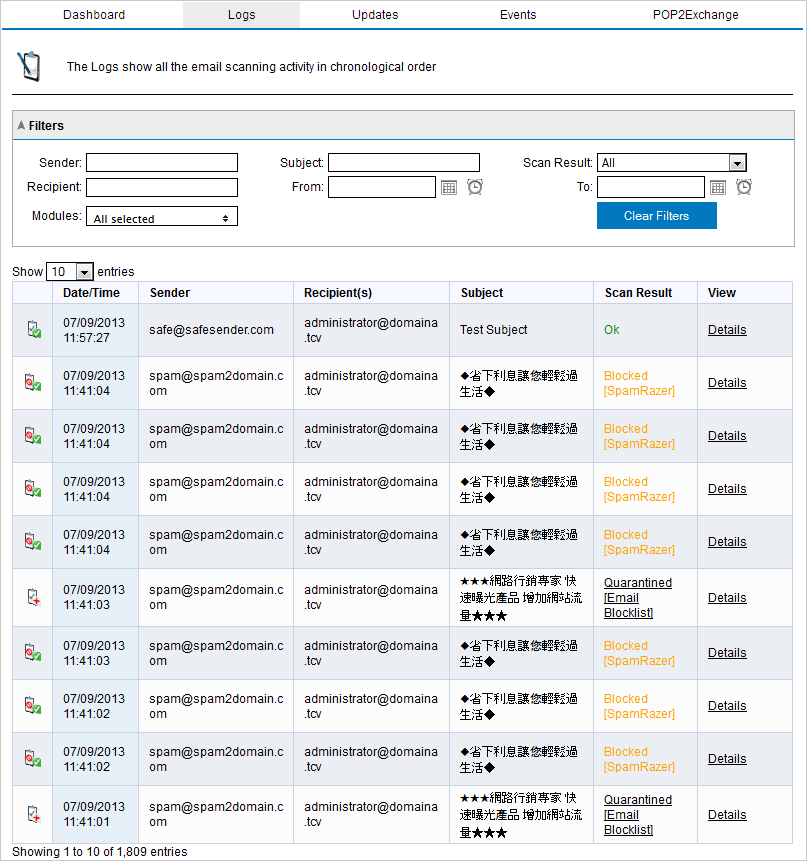
The Logs tab displays the following details for each email processed:
- Date/Time
- Sender
- Recipient(s)
- Subject
- Scan Result - shows the action taken on the email. The below table defines each action.
| Action | Description |
|---|---|
| OK | Email is not blocked by GFI MailEssentials and is delivered to its intended recipients. |
| Quarantined |
Email is blocked by an engine or a filter that has the action set to Quarantine. Click Quarantine to review the email. Note: The email cannot be previewed in quarantine if it was manually deleted from quarantine. |
| Blocked | Email is blocked by an engine or filter. Action taken is as configured for that particular engine. |
| Deleted | Email is blocked by an engine or filter with the action set to delete detected emails. |
| Failed |
Emails that could not be scanned by GFI MailEssentials. Email is moved to one of the following folders depending on which module was triggered:
Refer to this linked article on Reprocessing legitimate emails that fail. |
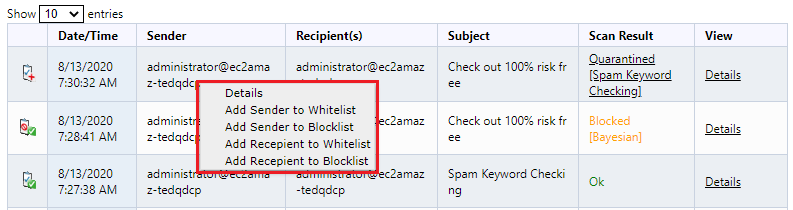
Working with the email processing logs
Senders and recipients can be added to the whitelist or blocklist directly from the processing logs page.
To action an email right-click any log entry. The following actions can be taken from the context menu:
| Action | Description |
|---|---|
| Details | Shows more detailed information about the email. Same as clicking on the Details link in the View column. |
| Add Sender to Whitelist | Adds the sender to the Whitelist. Emails from this sender bypass all the spam filters. |
| Add Sender to Blocklist | Adds the sender to the Blocklist. Emails from this sender are classified as spam. |
| Add Recipient to Whitelist | Adds the recipient to the Whitelist. Emails sent to this recipient bypass all the spam filters. |
| Add Recipient to Blocklist. | Adds the recipient to the Blocklist. Emails to this recipient are automatically classified as spam. |
Filtering the email processing logs
Filtering the email processing logs simplifies the reviewing process by providing the possibility to find particular emails using any of the several search parameters shown below:

From the Filters section, specify any of the following search criteria:
| Filter | Description |
|---|---|
| Sender | Specify the full or part of an email address to display only the emails sent by matching senders. |
| Recipient |
Specify the full or part of an email address to display only the emails sent to matching recipients. |
| Subject |
Specify the full or part of an email subject to display only the emails with a matching subject. |
| Scan result |
From the drop-down list, select whether to display only emails with a particular scan result (for example, Quarantined emails only) |
| From & To |
Specify a date and time range to display emails processed during that particular period. |
| Modules | Show only emails that were blocked by particular engines or filters. |
Note: Click on Clear Filters button to remove specified filters and show all processed emails.
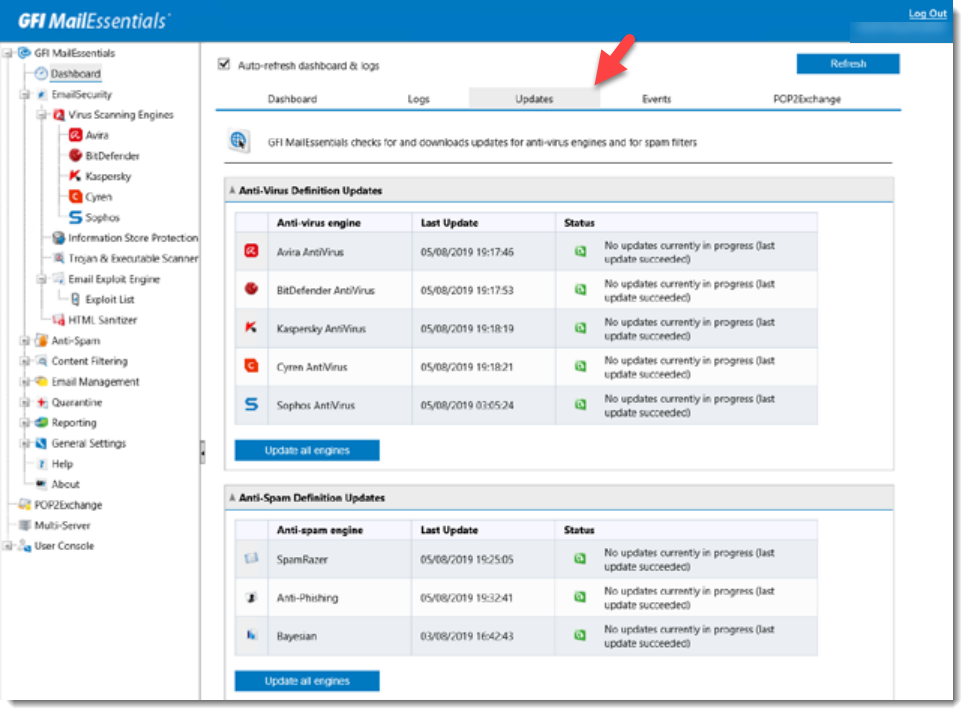
Updates
The Updates tab provides a quick overview of the anti-virus and anti-spam definition updates. You can use this screen to check the status of Anti-virus definitions.
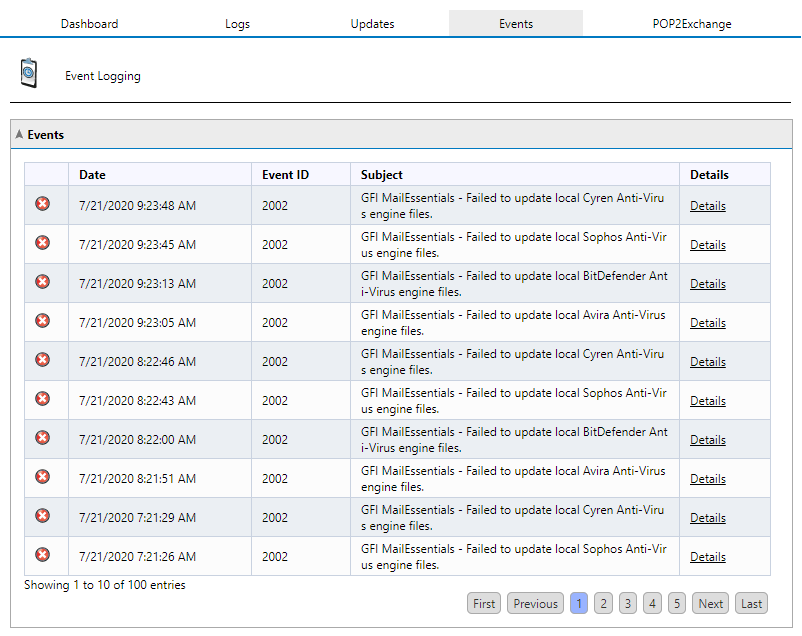
Events
Event Logging tab allows administrators to monitor important events related to the functionality of MailEssentials. Examples of instances that trigger events:
- completion of anti-spam engine updates
- reporting database reaches 1.7GB and GFI MailEssentials rolls over to a new database
- less than 1GB free disk space on the partition where quarantine is stored
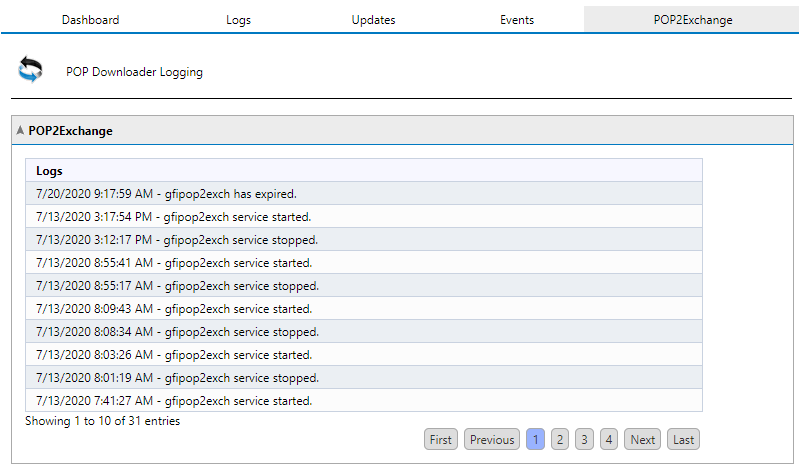
POP2Exchange
This tab allows you to monitor the POP2Exchange activity in real-time on deployments where this functionality is being used.
Related Articles
Priyanka Bhotika
Comments