Overview
The Auto Whitelist module when enabled ensures that senders to whom an email was previously sent are automatically excluded from being blocked (Auto-whitelisted).
Unlike the Whitelist and Keyword Whitelist modules, the MailEssentials Configuration UI does not provide a mechanism to export the Auto-Whitelist email entries.
This article describes the procedure to export the Auto-Whitelisted email address entries to various formats as desired for external analysis outside MailEssentials.
Solution
Download the third party Database .NET utility available here. The 32-bit edition is free for non-commercial use as outlined in their terms of use.
The Auto whitelist module works by extracting the recipient email addresses from outbound emails and adding them to the ControlLists.sdf database located at ...GFI\MailEssentials\Antispam\Data. This embedded SQL Server database (SQL Server Compact Edition) file can be accessed and opened using Database .NET database management utility.
..GFI\MailEssentials\Antispam\autowhitelist.mdb. This has since been deprecated in the newer versions due to limitations in the number of records that can be stored in MS Access. The file however still exists in the installation directory but will be empty if opened.
Follow the below steps to export the Auto-Whitelist entries:
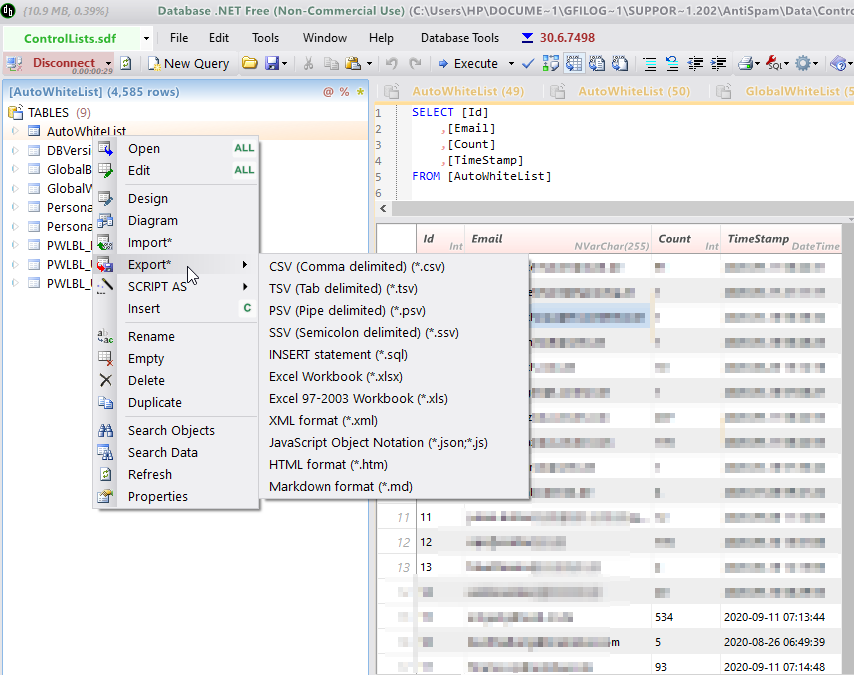
- Launch the Database .NET utility and locate the SQLCE node on the Connection Explorer. This is the connection type for opening SQL Server Compact Edition Database Files (.sdf)
- Right-click on SQLCE and select Open, then browse to the location of your
ControlLists.sdffile. It is recommended to make a backup copy of this database in case any inadvertent changes to the database are made during the export process. - Locate and double-click the table named AutoWhitelist to open and view the current entries to be exported.
- Right-click on the AutoWhitelist table and browse the Export node to select the desired format for the exported entries as shown below.
- Select the desired file format by clicking on it and selecting a location on your local drive to save the file. Note that some file formats are only available with the paid version of the utility but are free to try for a limited number of executions.

Testing
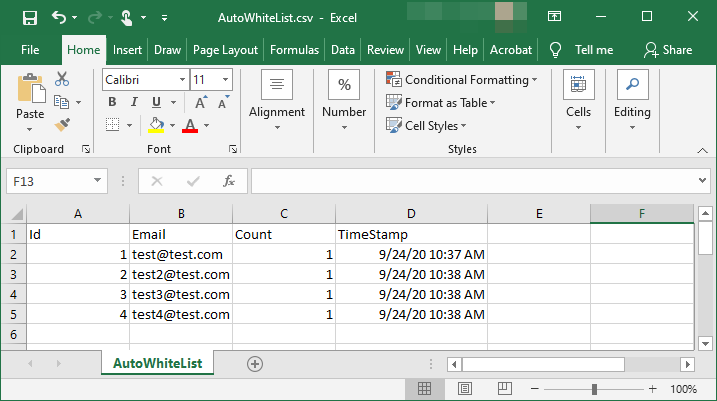
A new file named AutoWhiteList.* (e.g. AutoWhiteList.csv) will be created at the selected location. Browse to the file location and open the exported file using the appropriate program to view the exported Auto Whitelist entries.
Priyanka Bhotika
Comments